This is the third and last part of a series of posts on Nexus 3 and how to use it as repository for several technologies. (Part 1. Part 2.)
NOTE: We are constantly improving Sonatype Nexus Repository. This blog may no longer be accurate. You can find the latest instructions here.
Installation
Check out the first part of this series to see how we installed and ran Sonatype Nexus 3 using a single docker command. Just do that and the installation is done.
Configuring Sonatype Nexus as a Docker repo
What we will do:
– create a private (hosted) repository for our own images
– create a proxy repository pointing to Docker Hub
– create a group repository to provide all the above repos under a single URL
I suggest you to create a new blob store for each new repo you want to create. That way, the data for every repo will be in a different folder in /nexus-data (inside the Docker container). But this is not mandatory for it to work.
By default, the Docker client communicates with the repo using HTTPS. In my use case I had to configure it with HTTP, because we didn’t have the certificate nor the knowledge on how to obtain it.
Important to notice: the Docker repo requires 2 different ports. We are going to use 8082 for pull from the proxy repo and 8083 for pull and push to the private repo.
I had some problems with slightly older versions of Docker, so I strongly suggesting you to start with the version that I’ve tested with, that is 1.12.3.
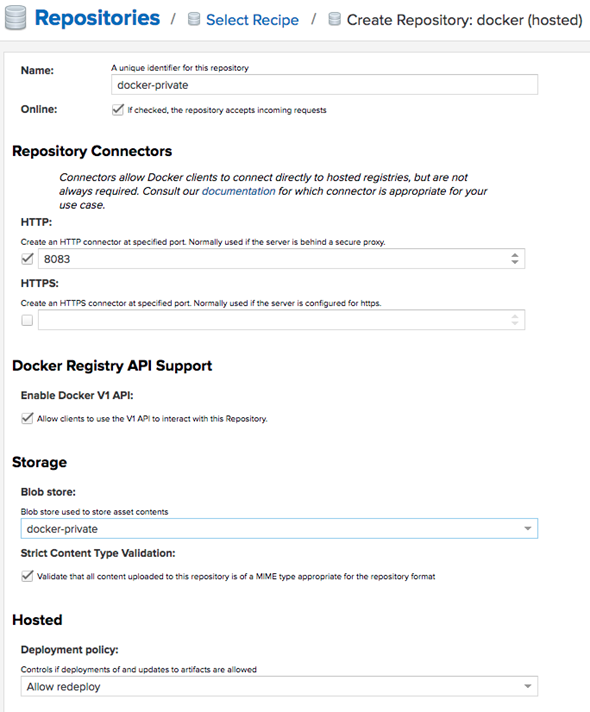
private repo
A repository for Docker images that your team creates.
Create a new Docker (hosted) repository and configure it like:
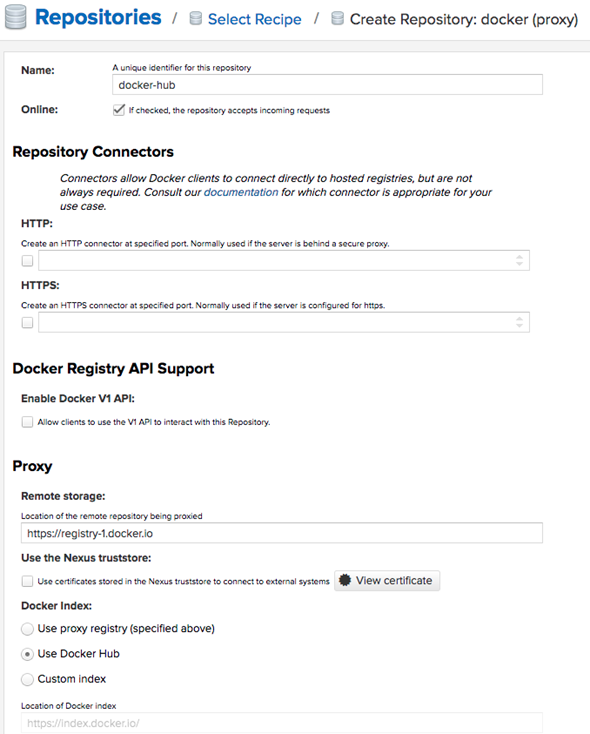
proxy repo
A repository that proxies everything you download from the official registry, Docker Hub. Next time you download the same dependency, it will be cached in your Sonatype Nexus.
Create a new Docker (proxy) repository and configure it like:
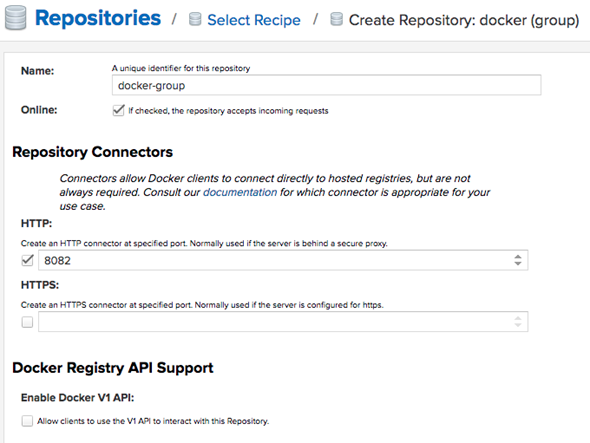
group repo
This will group all the above repos and provide you a single URL to configure your clients to download from to.
Create a new Docker (group) repository and configure it like:
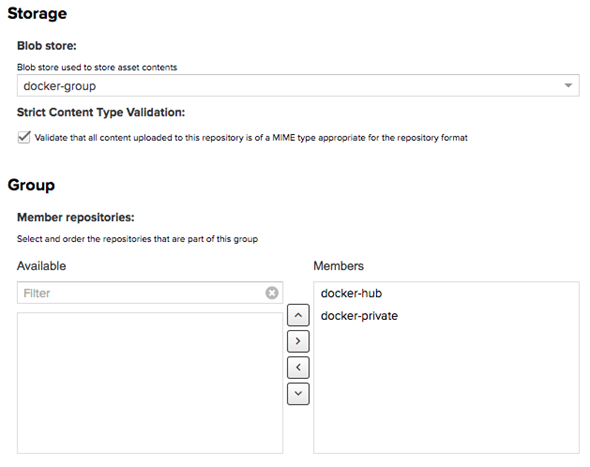
You can create as many repos as you need and group them all in the group repo.
This step is actually optional to use Sonatype Nexus 3 as a Docker repository, because we can stick to pulling and pushing to the proxy and hosted repositories as will be discussed later.
Configuring your clients and projects to use your Sonatype Nexus repos
To interact with your repo, the first thing is to configure the Docker daemon in your machine to accept working with HTTP instead of HTTPS.
How exactly to do this config depends on your operating system, so you should check dockerd documentation. On RHEL I did it putting this content in /etc/docker/daemon.json:
{
  "insecure-registries": [
    "your-repo:8082",
    "your-repo:8083"
  ],
  "disable-legacy-registry": true
}
You have to restart the daemon after setting this (sudo systemctl restart docker).
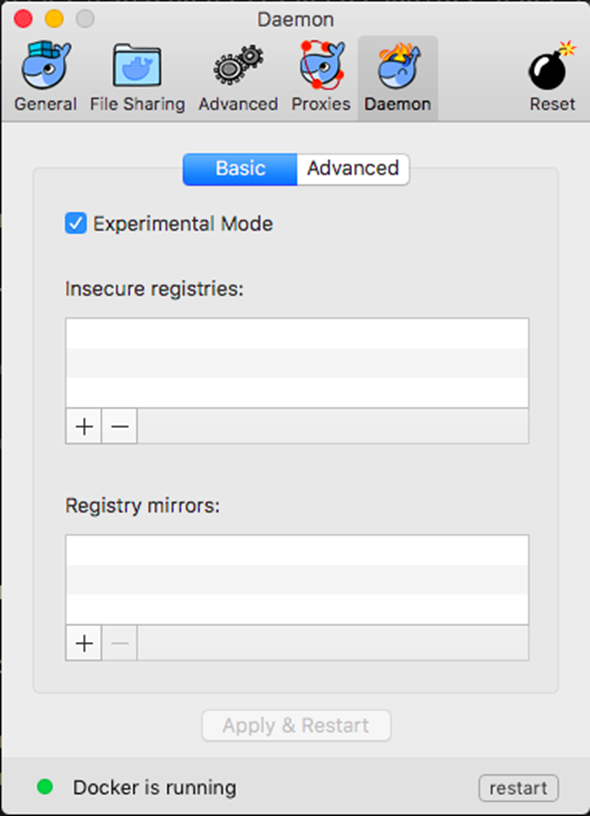
On Windows or Mac you should config your deamon in a box like this:
Now we have to authenticate your machine to the repo with:
docker login -u admin -p admin123 your-repo:8082
docker login -u admin -p admin123 your-repo:8083
This will create an entry in ~/.docker/config.json:
{
	"auths": {
		"your-repo:8082": {
			"auth": "YWRtaW46YWRtaW4xMjM="
		},
		"your-repo:8083": {
			"auth": "YWRtaW46YWRtaW4xMjM="
		}
}
To pull images from your repo, use (notice port 8082 being used):
docker pull your-repo:8082/httpd:2.4-alpine
To push your own images to your repo, you have to tag the image with a tag that points to the repo. This is strange to me, since I was trying to think about Docker tags the same way I do about Git tags, but they seem be somewhat different (notice port 8083 being used):
docker tag your-own-image:1 your-repo:8083/your-own-image:1
docker push your-repo:8083/your-own-image:1
To pull your own images from the repo, you can use:
docker tag your-own-image:1 your-repo:8082/your-own-image:1
# or
docker tag your-own-image:1 your-repo:8083/your-own-image:1
Both ports will work. I suspect that is because using port 8083 will connect directly to the hosted repo, whilst using port 8082 will connect to the group repo, which contains the hosted repo. I suggest you to stick to port 8083 to avoid duplicate images in your machines. If you chose to stick with port 8083 to pull your own images, you probably could skip creating the group repo, if you prefer.