In this guide, we will use Jenkins as a Continuous Integration server and Sonatype Nexus Repository as a build repository.
The goal of this guide is to create a workflow where we can build, store, organize, and monitor the compiled artifacts by Maven through our CI server.
Before we begin, make sure that you already have Jenkins up and running. In case you haven't set up Jenkins yet, then copy the below command and run it on your Docker enabled host/machine.
$ docker run -d --name jenkins-ci -p 8080:8080 jenkins/jenkins:ltsOnce the Jenkins container is configured on your local/remote machine, go to your preferred browser and open the URL:
http:///your-ip-addr:8080On the very first page, Jenkins will ask you for the admin password, which you can find by running below mentioned command in your terminal:
$  docker exec -i jenkins-ci cat /var/jenkins_home/secrets/initialAdminPassword

b5102c8d9fa245dbb0b8da03f504d3a5
Follow the guided steps to finish the configuration. Save the username and password securely for future use.
Installing Sonatype Nexus Repository
Sonatype Nexus Repository is a repository manager that allows you to store and retrieve artifacts. It enables you to host your built artifacts in a private and secure repo. [Editor's note: Free Sonatype Nexus Repository training is available here.]
You can always pull the Sonatype Nexus Docker image using the following command:
$ docker pull sonatype/nexus3

Using default tag: latest
latest: Pulling from sonatype/nexus3
cb3c77f9bdd8: Pull complete
fd8daf2668d1: Pull complete
fd1ff82b00e8: Pull complete
2a05f7b573af: Pull complete
Digest: sha256:6570855dfbc3eb094fe5cbbacec87aa8b91d16394dab627177e1deeebb5ac8ee
Status: Downloaded newer image for sonatype/nexus3:latest
docker.io/sonatype/nexus3:latest
Now it's time to run downloaded sonatype/nexus on the default port 8081. Follow these commands:
$ docker run -d --name nexus_repo -p 8081:8081 sonatype/nexus3Usually it takes 1 to 2 minutes for the Sonatype Nexus Repository service to launch in your newly created Docker container. If you wish to follow the log to see if Sonatype Nexus Repository is up and ready, then run the following command:
$ docker logs nexus_repo -f In logs you will see a message stating
This means your Sonatype Nexus Repository Manager is ready to use. Now go to your browser and open:
Started Sonatype Nexus OSS 3.20.1-01This means your Sonatype Nexus Repository Manager is ready to use. Now go to your browser and open:
http://your-ip-addr:8081Find the Sign In option as shown below:
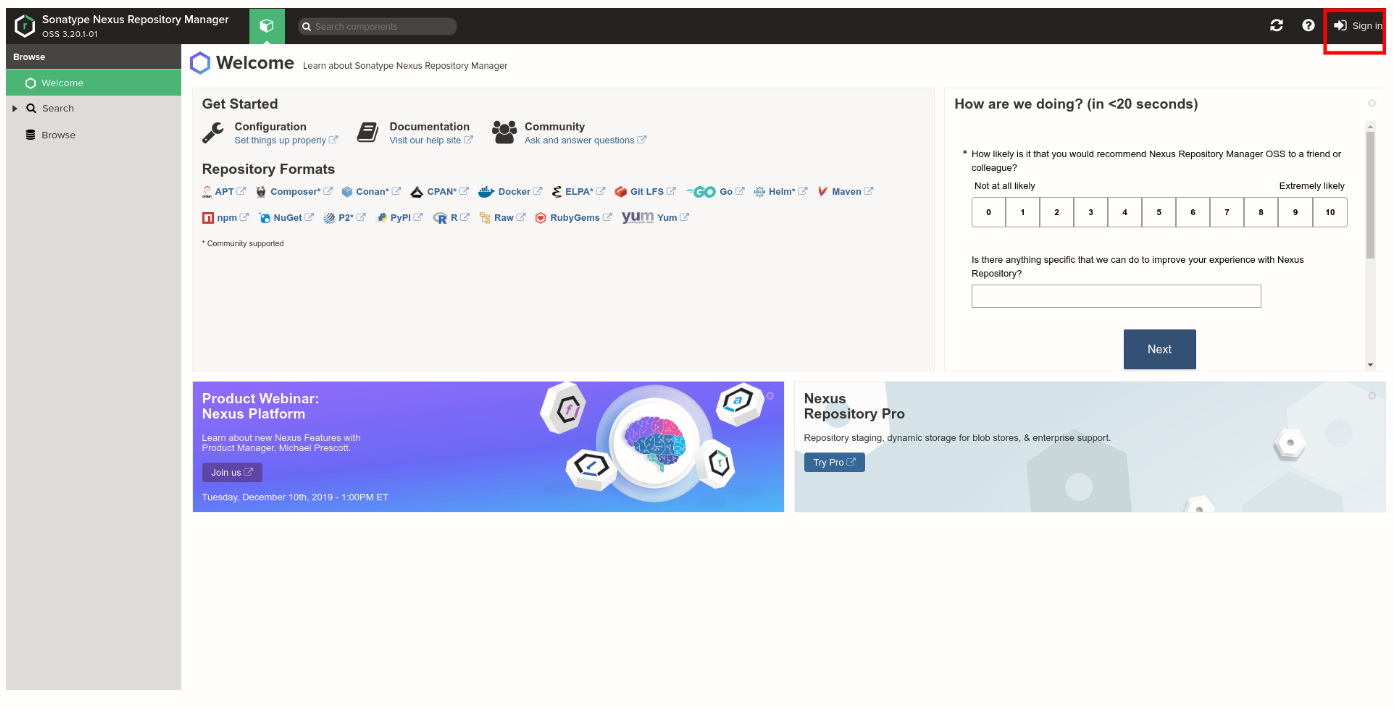
The default username is admin, whereas to retrieve the password you need to run the following command:
$ docker exec -i nexus_repo cat /nexus-data/admin.password
502ace93-5450-4f0d-97d2-9b3b3a88d149
And that’s it. Your Sonatype Nexus Repository Manager is ready to use. The next step is to create a new repository.
Create a repository in Sonatype Nexus Repository
In this step, you are going to create a Maven Hosted repository in Sonatype Nexus Repository, where your Jenkins is going to upload "build" artifacts.
Step 1:
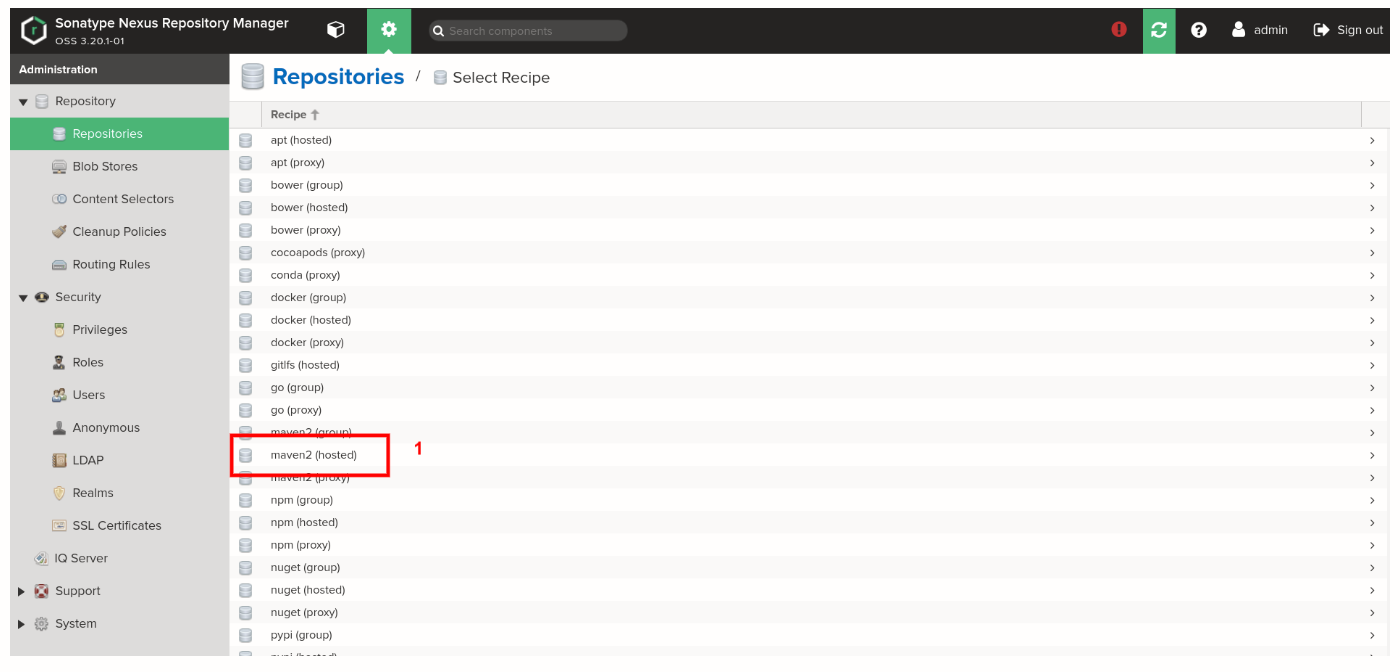
Follow the below-mentioned steps to create a hosted repository, name it
Follow the below-mentioned steps to create a hosted repository, name it
maven-nexus-repo, which you are going to use throughout this guide.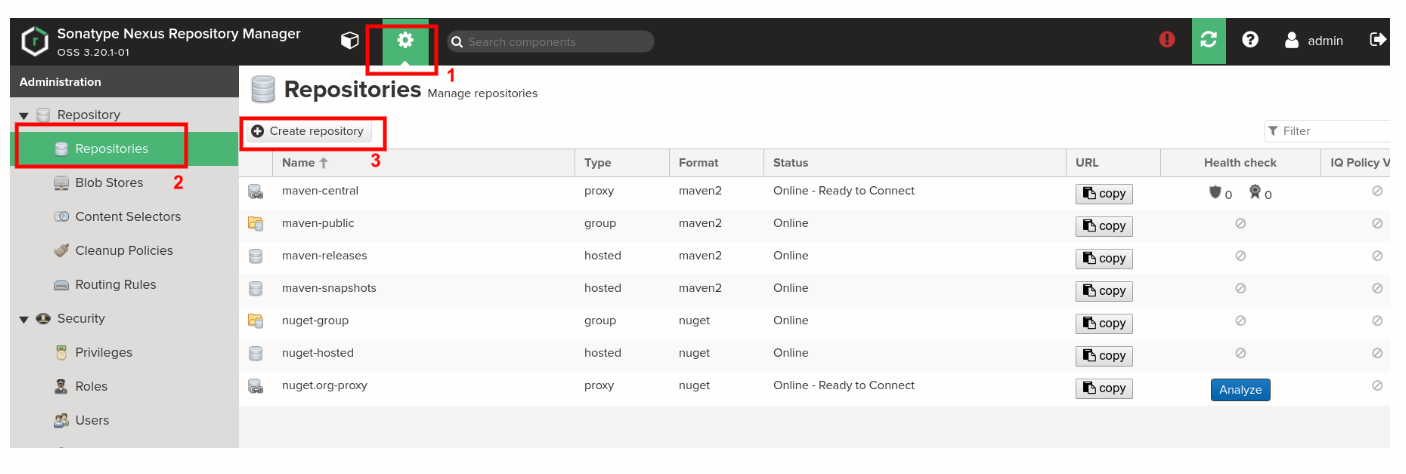
Select maven2 (hosted) recipe from the list as shown below:
Step 2:
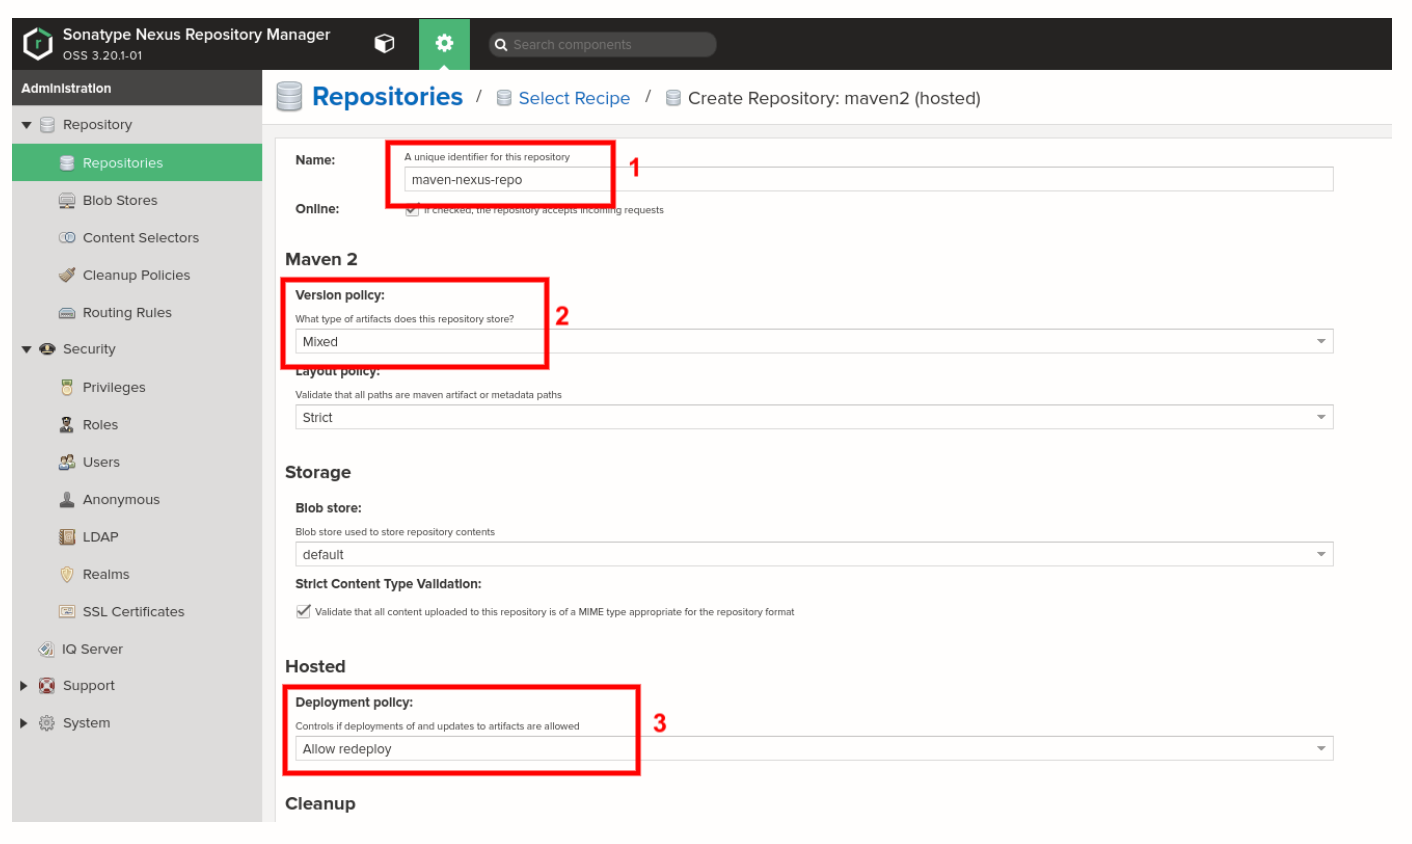
On the Create Repository page
On the Create Repository page
- Enter the name as maven-nexus-repo
- In Version Policy, select the Mixed type of artifacts.
- Under the Hosted section, in Deployment policy, select Allow redeploy. It will allow you to deploy an application multiple times.
Step 3:
To create a new user, go to Dashboard > Server Administrator and Configuration > User > Create user. Select Local user type which happens to be the default Realm:
To create a new user, go to Dashboard > Server Administrator and Configuration > User > Create user. Select Local user type which happens to be the default Realm:
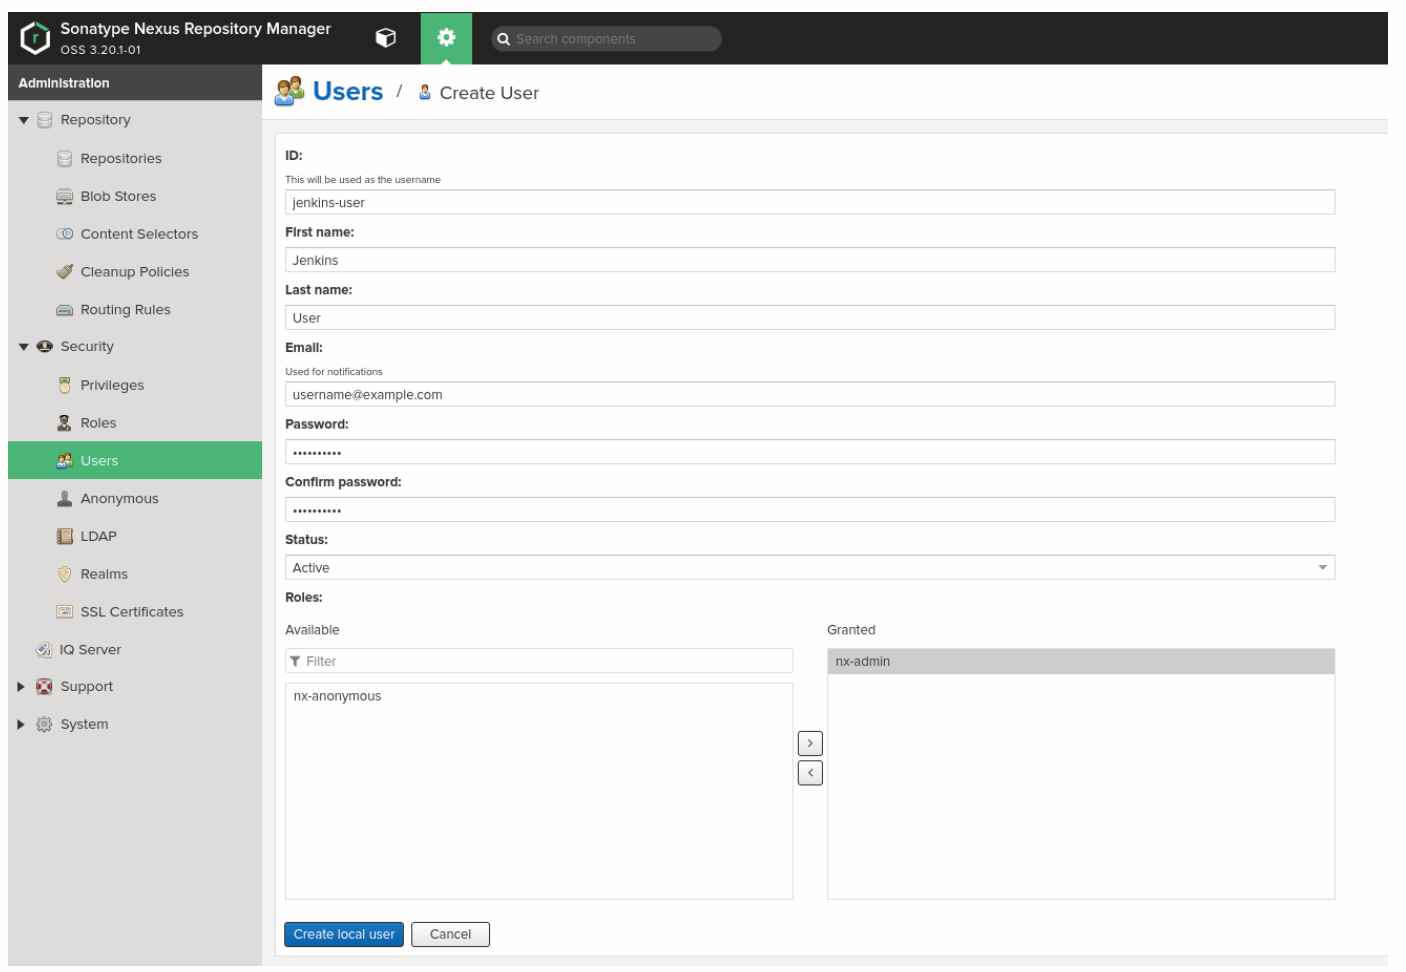
In the Create User page
- ID: Enter the desired ID; in our case, it is jenkins-user.
- First Name: Enter the desired first name; in our case, it is Jenkins.
- Last Name: Enter the desired second name; in our case, it is User.
- Email: Enter your email address.
- Status: Select Active from your drop-down menu.
- Roles: Make sure that you grant the nx-admin role to your user.
If you want more user creation details, click here.
With this, we are through with the setup part of Sonatype Nexus Repository Manager. Let us move to Jenkins to setup Sonatype Nexus there.
Install and configure Sonatype Nexus Repository plugins in Jenkins
Here you are going to install and configure a few plugins for Sonatype Nexus in Jenkins. For this, go to Jenkins and then Dashboard > Manage Jenkins > Manage Plugins > Available and search and install Sonatype Nexus Artifact Uploader and Pipeline Utility Steps.
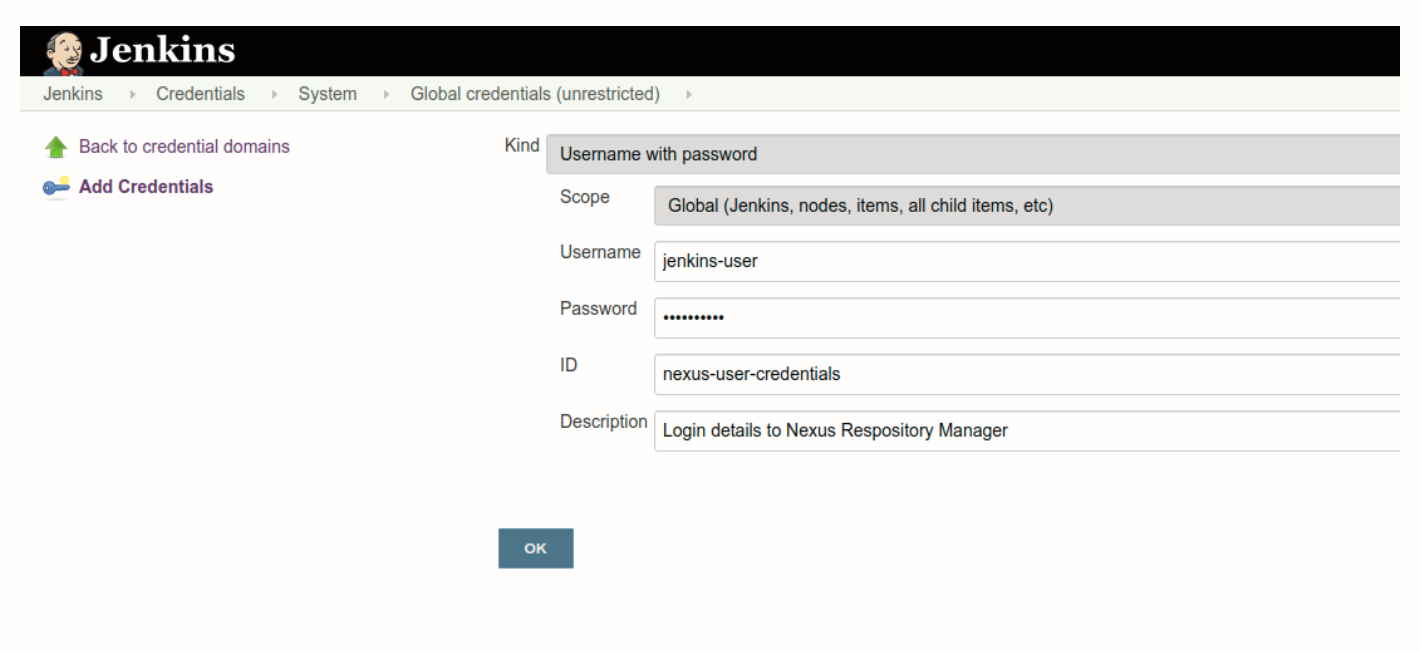
Add Sonatype Nexus Repository's user credentials in Jenkins.
Go to Dashboard > Credentials > System > Global credentials (unrestricted), as shown below:
Next, set up Maven as a managed tool. Go to Dashboard > Manage Jenkins > Global Tool Configuration and find Maven. Under this section, click on the Maven Installations button and add Maven, as shown below:
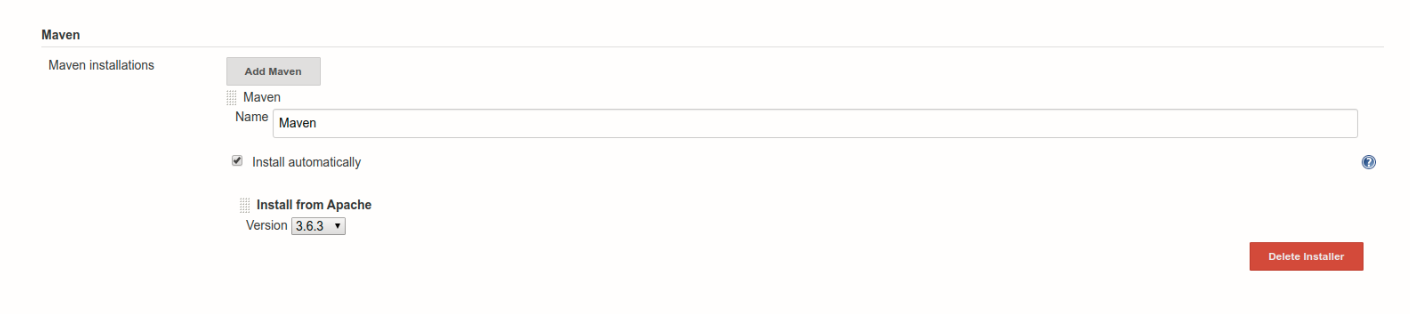
Alternatively, you can also install the Maven binary directly to your container on the
/var/jenkins_home directory.Create a Jenkins Pipeline
It's time to create a Jenkins Job. Here you are going to use Pipeline job type, named as JenkinsNexus, as shown below:
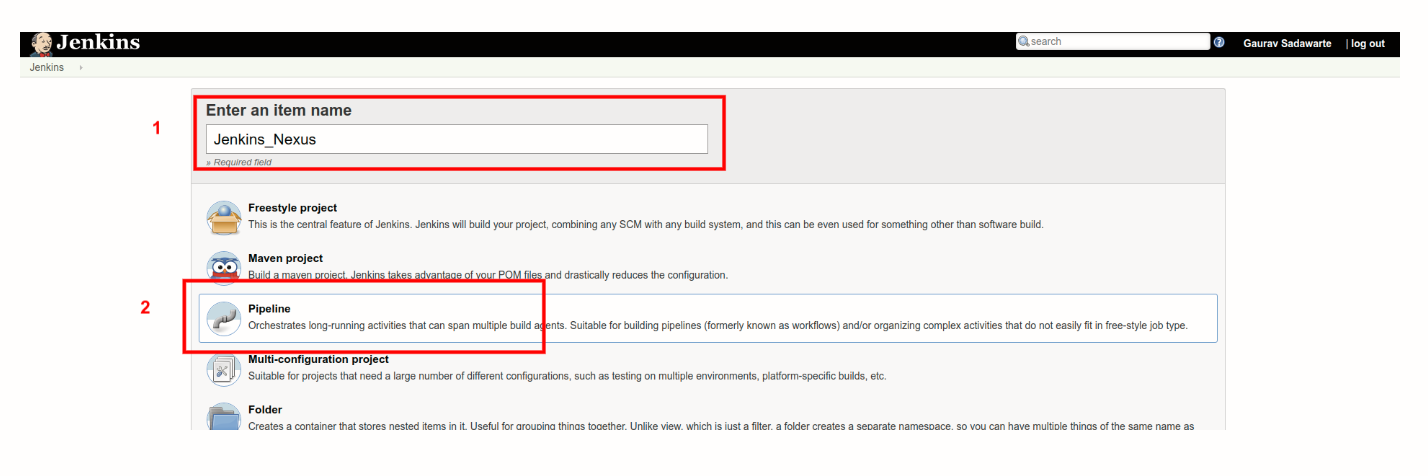
In the next page, find the Pipeline section and copy the below-mentioned script in the text area:
pipeline {
    agent {
        label "master"
    }
    tools {
        maven "Maven"
    }
    environment {
        NEXUS_VERSION = "nexus3"
        NEXUS_PROTOCOL = "http"
        NEXUS_URL = "you-ip-addr-here:8081"
        NEXUS_REPOSITORY = "maven-nexus-repo"
        NEXUS_CREDENTIAL_ID = "nexus-user-credentials"
    }
    stages {
        stage("Clone code from VCS") {
            steps {
                script {
                    git 'https://github.com/javaee/cargotracker.git';
                }
            }
        }
        stage("Maven Build") {
            steps {
                script {
                    sh "mvn package -DskipTests=true"
                }
            }
        }
        stage("Publish to Nexus Repository Manager") {
            steps {
                script {
                    pom = readMavenPom file: "pom.xml";
                    filesByGlob = findFiles(glob: "target/*.${pom.packaging}");
                    echo "${filesByGlob[0].name} ${filesByGlob[0].path} ${filesByGlob[0].directory} ${filesByGlob[0].length} ${filesByGlob[0].lastModified}"
                    artifactPath = filesByGlob[0].path;
                    artifactExists = fileExists artifactPath;
                    if(artifactExists) {
                        echo "*** File: ${artifactPath}, group: ${pom.groupId}, packaging: ${pom.packaging}, version ${pom.version}";
                        nexusArtifactUploader(
                            nexusVersion: NEXUS_VERSION,
                            protocol: NEXUS_PROTOCOL,
                            nexusUrl: NEXUS_URL,
                            groupId: pom.groupId,
                            version: pom.version,
                            repository: NEXUS_REPOSITORY,
                            credentialsId: NEXUS_CREDENTIAL_ID,
                            artifacts: [
                                [artifactId: pom.artifactId,
                                classifier: '',
                                file: artifactPath,
                                type: pom.packaging],
                                [artifactId: pom.artifactId,
                                classifier: '',
                                file: "pom.xml",
                                type: "pom"]
                            ]
                        );
                    } else {
                        error "*** File: ${artifactPath}, could not be found";
                    }
                }
            }
        }
    }
}
Let's break down the above-mentioned parameters bit by bit:
- NEXUS_VERSION: Here, we have to mention the exact version of Nexus, which can be
nexus2ornexus3. In our case, it is latest version ofnexus3. - NEXUS_PROTOCOL: For this guide we have used HTTP protocol, although, in case of production, you will have to use HTTPS.
- NEXUS_URL: Add your IP address and port number, where you are running Nexus. Make sure that you add Nexus instance details without mentioning protocols, i.e.,
httpsorhttp. - NEXUS_CREDENTIAL_ID: Enter the user ID, which you previously created in Jenkins, which in our case is
nexus-user-credentials. - Project Git: Under stages, we used
https://github.com/javaee/cargotracker
As you are through with the Pipeline set up, it's time to
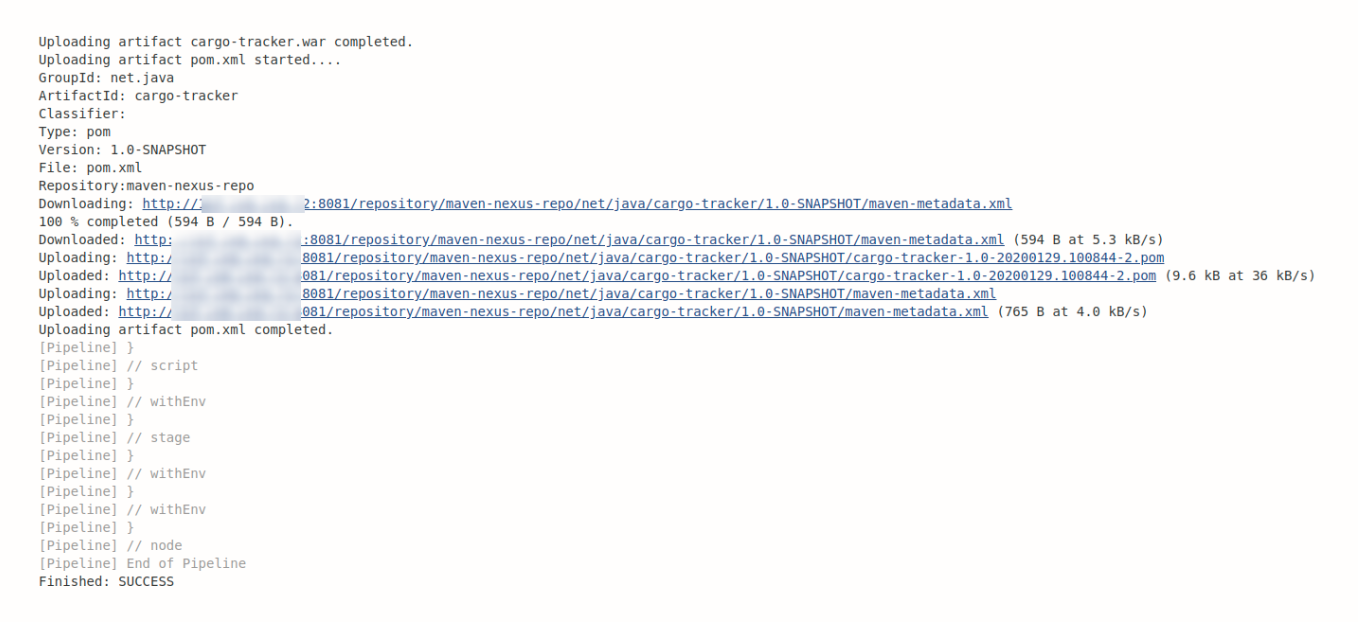
Build our project. Go to the JenkinsNexus project job page and click Build Now. As this is your first build, it is going to take some time, so sit tight.Once build is a success, in your Jenkins Console Output, you will see something like this:
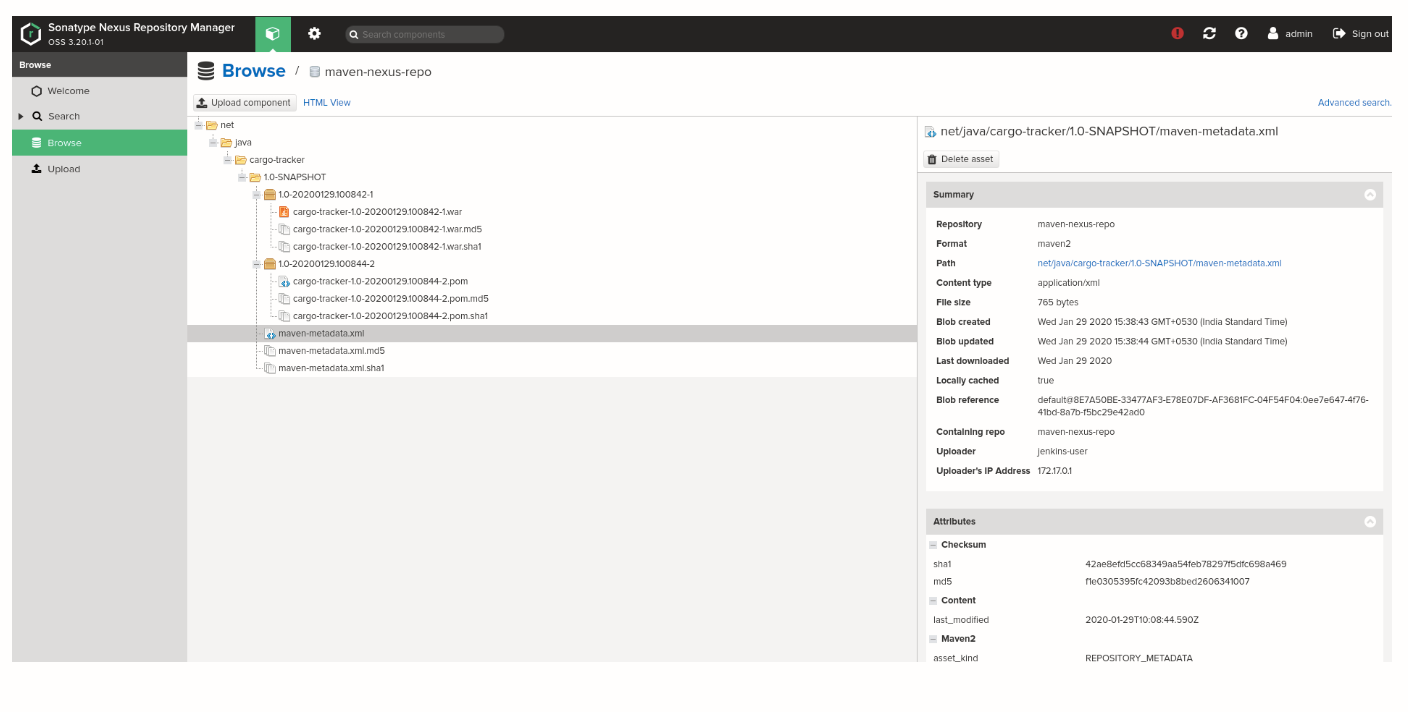
Whereas, in your Sonatype Nexus Repository, you would see something similar to this:
Conclusion
A systematic way to distribute the project's artifacts is critical for any organization. With the help of Jenkins Pipeline and Sonatype Nexus Repository, you can centralize artifact repo, which ultimately reduces the efforts of reproducing build time as well as switch CI tools without worrying about migrating our artifacts.
Sonatype Nexus Repository can be configured with cloud storage services like AWS S3 and Google Cloud Storage as well, which gives you additional freedom and delivery application without any hassle of storage.
Hope you liked the article and make good use of it.
Originally published on AppFleet