- Spring Boot/Java : Maven
- PHP : composer
- Node.js : npm
- Python : pip
- Easy integration
- Customizable for special purposes
- Common format can be used throughout the organization
- Less development effort
- An industry best practice
- More user friendly for developers
We can publish custom modules in above mentioned package managers in private so those who are in a certain organization or group will be able to use them. There are several platforms that can be used to publish and consume those custom modules and here I used Sonatype Nexus Repository since it has the capability to configure for several tech stacks such as maven, npm, composer, nuget, etc.
Sonatype Nexus Repository OSS is an open source repository that allows you to proxy, collect, and manage your packages/dependencies. I'm going to show you how to configure a private npm registry in Sonatype Nexus Repository, which is free, and how to publish and consume custom Node.js modules in your Node.js projects.
The example shows how to locally host the application and use it. The tech stack that we'll use is:
- Docker
- Sonatype Nexus Repository
- npm
- Node.js
Local Sonatype Nexus Repository integration
First you have to run docker on your local machine, for that Docker Desktop can be used. Install and run docker desktop from this link:
https://www.docker.com/products/docker-desktop
Make sure it has been installed correctly using below command and it shows the current version of application.
docker -v

Sonatype provides the docker image for Nexus which can be easily pulled locally using the following pull command:
docker pull sonatype/nexus3
Once the image is pulled, to run, just execute the following command below:
docker run --rm -it -p 8395:8081/tcp sonatype/nexus3:latest
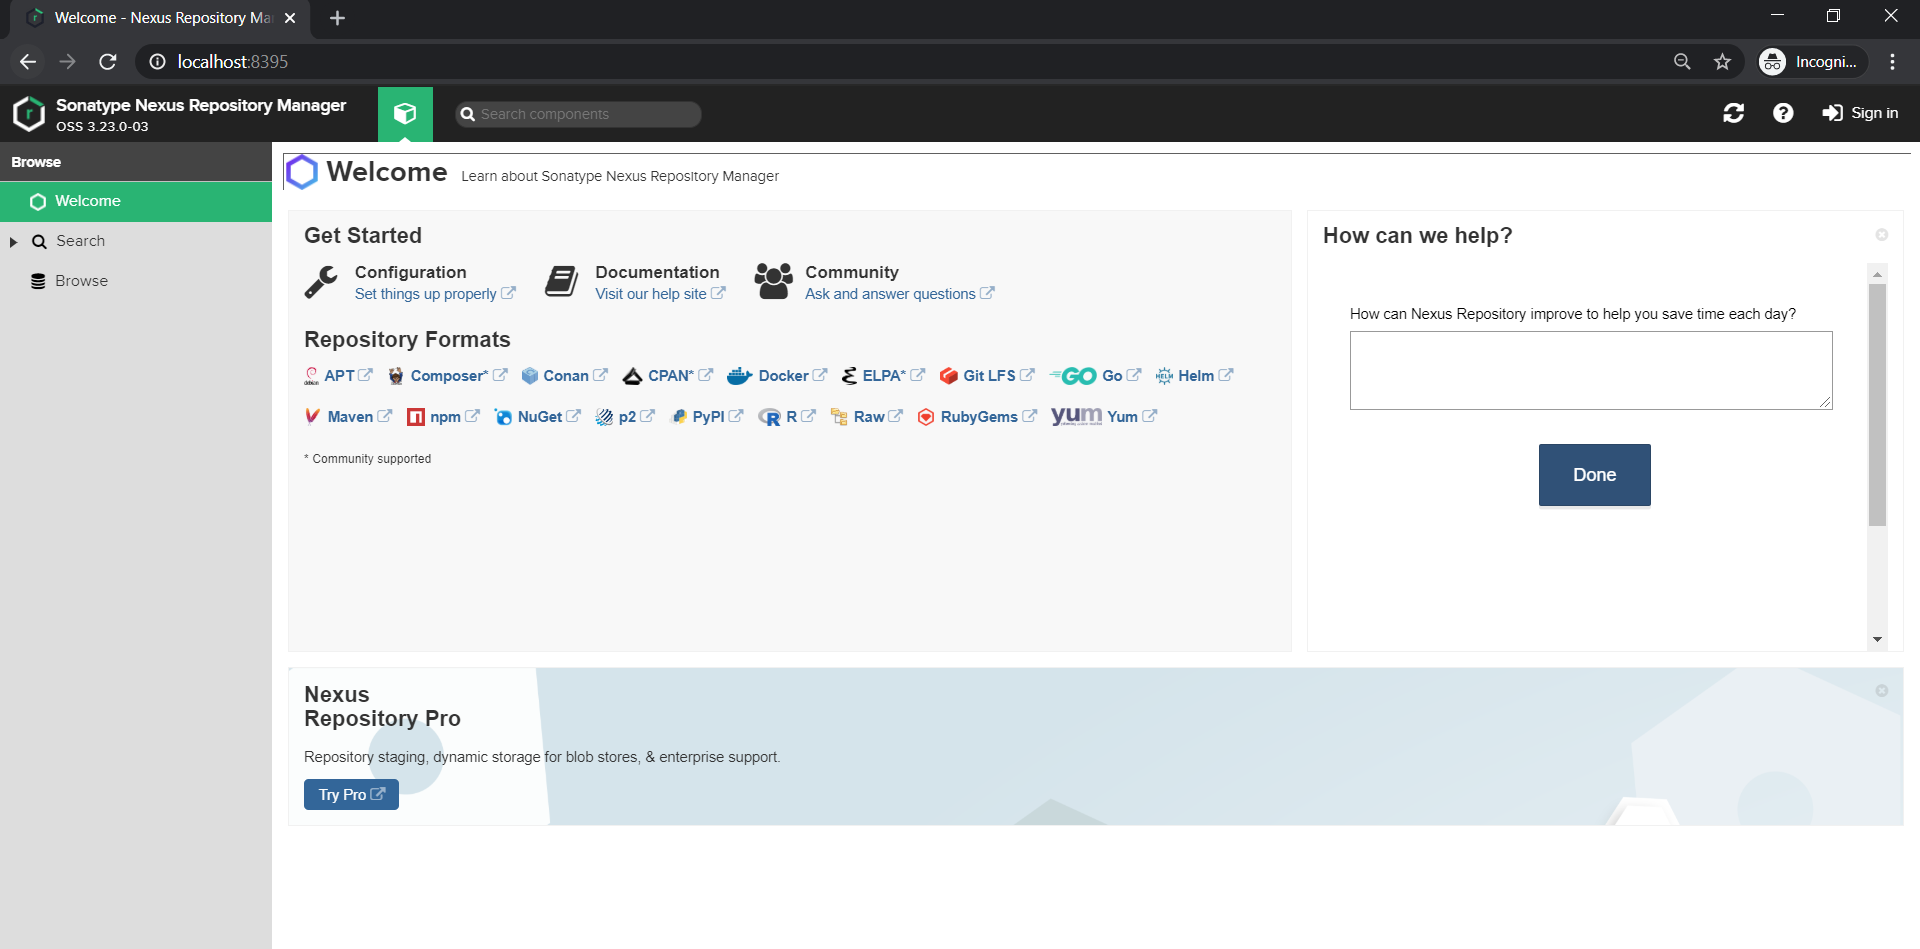
This brings up the container running our instance of Nexus. To try it out, open http://localhost:8395 in the browser, and, you will get a window shown as below.
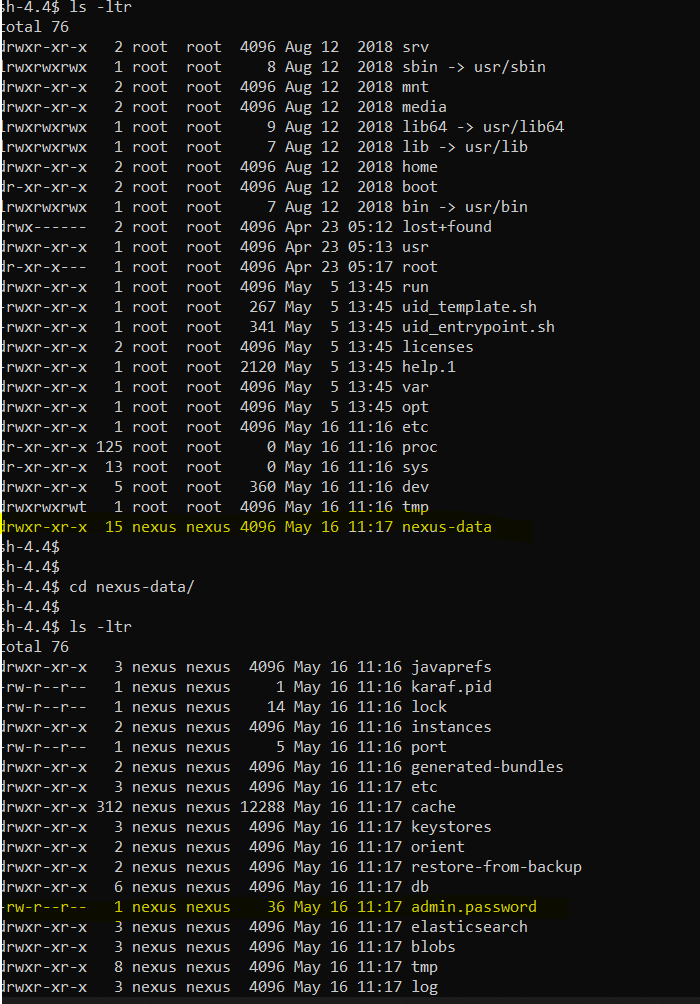
You can find the admin password for login inside the Nexus container.
docker container ls --all

docker exec -ti b426554e61ed sh
It is available at /nexus-data/admin.password file.
Sign by giving that password for user admin. Then you should change the default password and create a new one since every Nexus user around the world knows what the default username and password are.
Configure Sonatype Nexus Repository for npm registry
Sonatype Nexus Repository exposes a group of repositories which is internally a combination of our private repository and a proxy to the public npm registry. We can get and store customized node modules/dependencies in a private repository. A public repository is used to get available node modules (access all the publicly available repositories from the npm registry). Whenever we consume public packages, they get cached in the proxy.
When we want to install a new public or private npm package, we point our project's registry to the group so that it can install any package necessary. To create or update an existing repository, point the publish action to the hosted repository.
This is why we see a default set of group/hosted/proxy repositories combination created for us when we load Nexus for the first time.
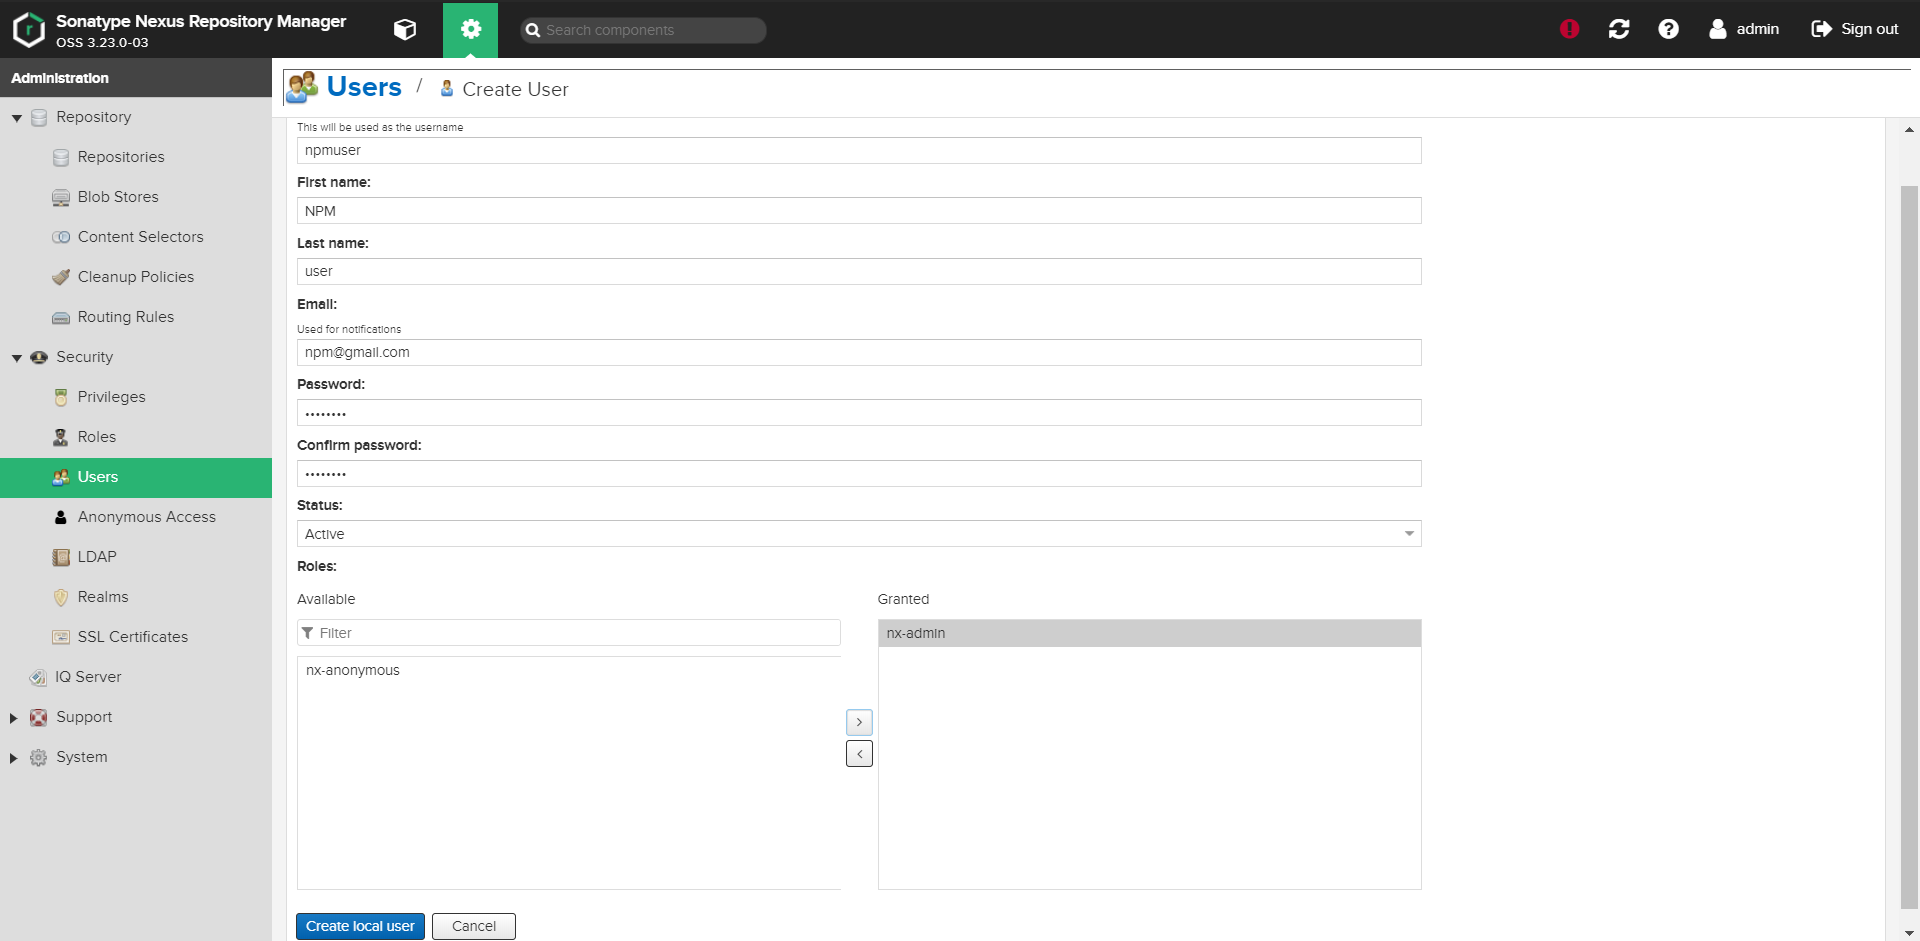
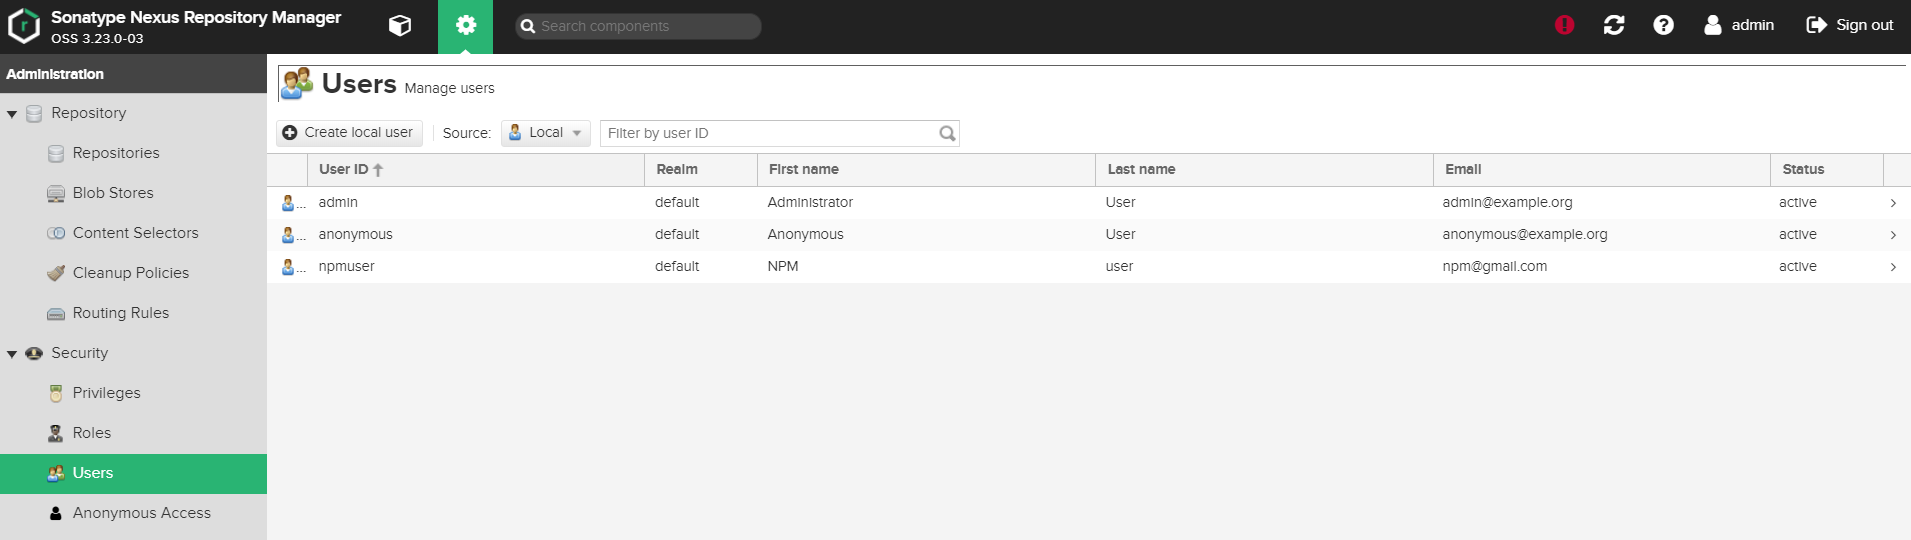
1. User creation
Let's create a user for our application. Create custom roles and only assign roles to users based on their need.
Next, let us prevent unauthorized users from accessing our server. Click on Anonymous under Security and uncheck the option to allow accessing the server:

2. Volume management
Due to the stateless nature in docker containers we have to store data in a volume so that we can use the same configured data again and again without loosing them.
First, let us create a directory in which we will be placing all the nexus-data generated with respect to this example. D:/nexus-data directory is available to store data.
This is the folder which we will be using as a temporary volume for our Nexus image. We now need to provide the path to our volume while issuing the run command for the container:
docker run --rm -it -p 8395:8081 -v D:/nexus-data:/nexus-data sonatype/nexus3
The highlighted part above is the one which makes all the difference, we are specifying the complete path to our nexus-data directory and we are mounting it to the default data directory called nexus-data within the Nexus container. Additional properties and configurations are listed here.
Once we run the command listed, we see different folders created under the nexus-data folder that we created. Any and all changes that we make in Nexus now would get synced back to this folder. If you are curious, create the npmuser with admin role again, stop the container and restart it. The newly created user would be persisted as expected.

3. Creating Blob
Let's create a Blob store which is a logical partition that we want to enforce for our different project type (we want to segregate our npm binaries and Maven binaries to avoid any conflicts). Any package that we upload now to that blob would get persisted in the volume under the folder associated with it.

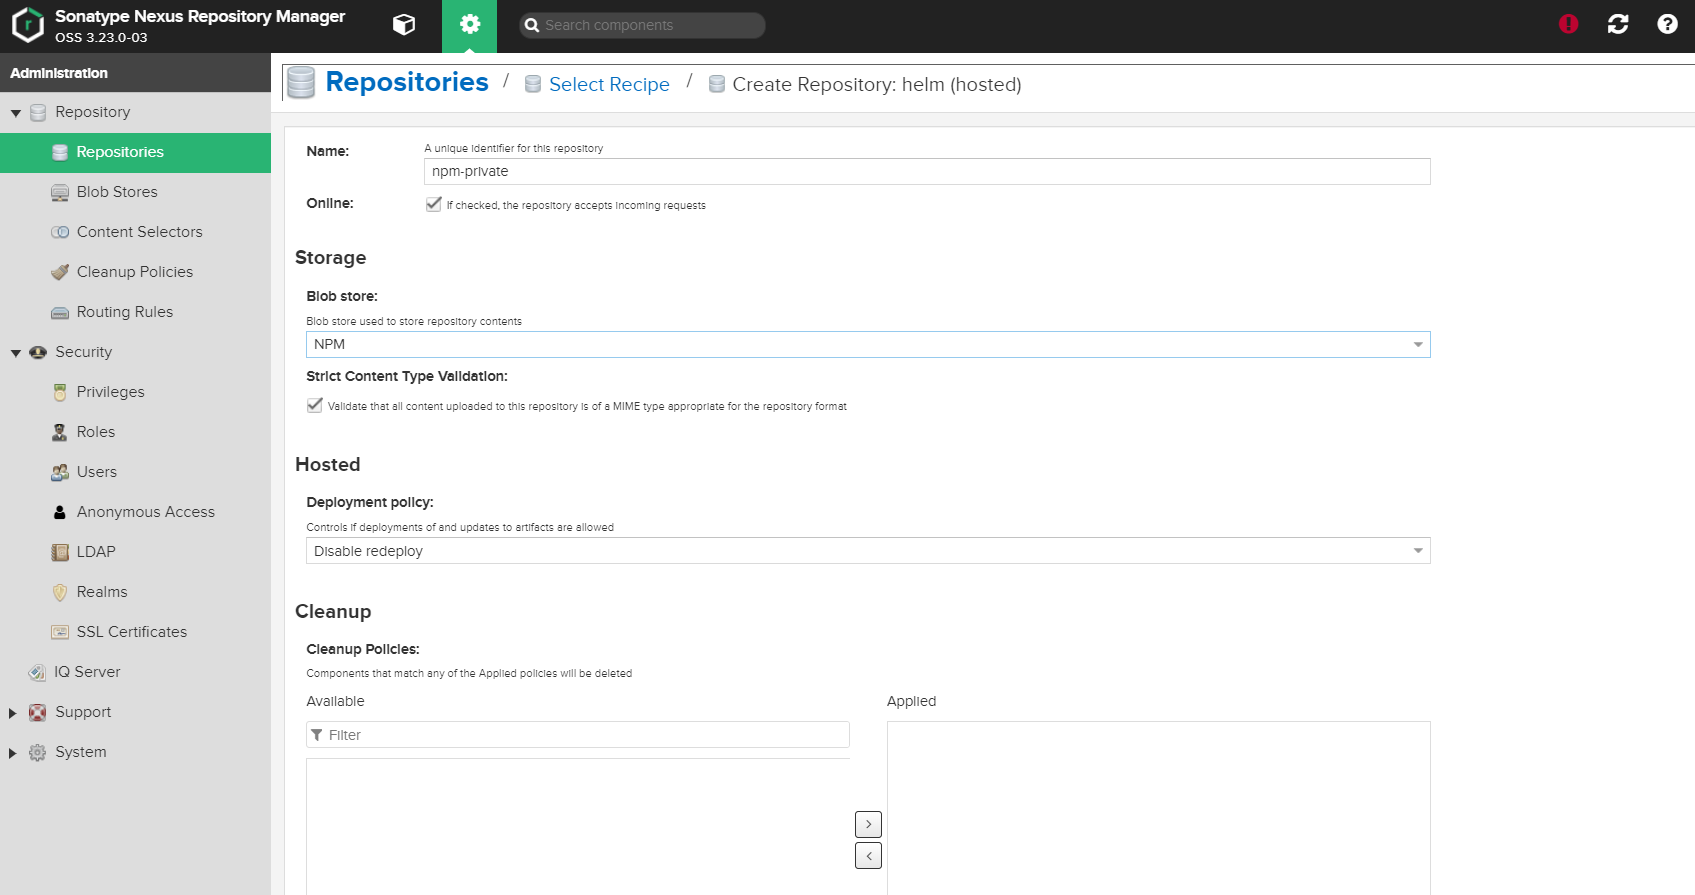
4. Creating hosted repository
Hosted repository is used as the private repository to store private node packages. Since this repository is private, to access it a user needs an auth token. We will talk about it at the end of the article.
To create a hosted repository, go to the Settings page > Repository > Repositories > Create Repository. There you can find the certain type of repository needs to be configured. Here we considered only npm repositories.

select the npm(hosted) option and configure it as shown in below image.
5. Creating proxy repository
Since we created a private repo, now we need to set up a public npm repository. After that we can add both hosted and proxy repositories into a group. Therefore we'll be able to use both of them through a group. When we want to add a package first it'll looking for the private one and if it is not available there it will looking for the public one. Configure it as below.
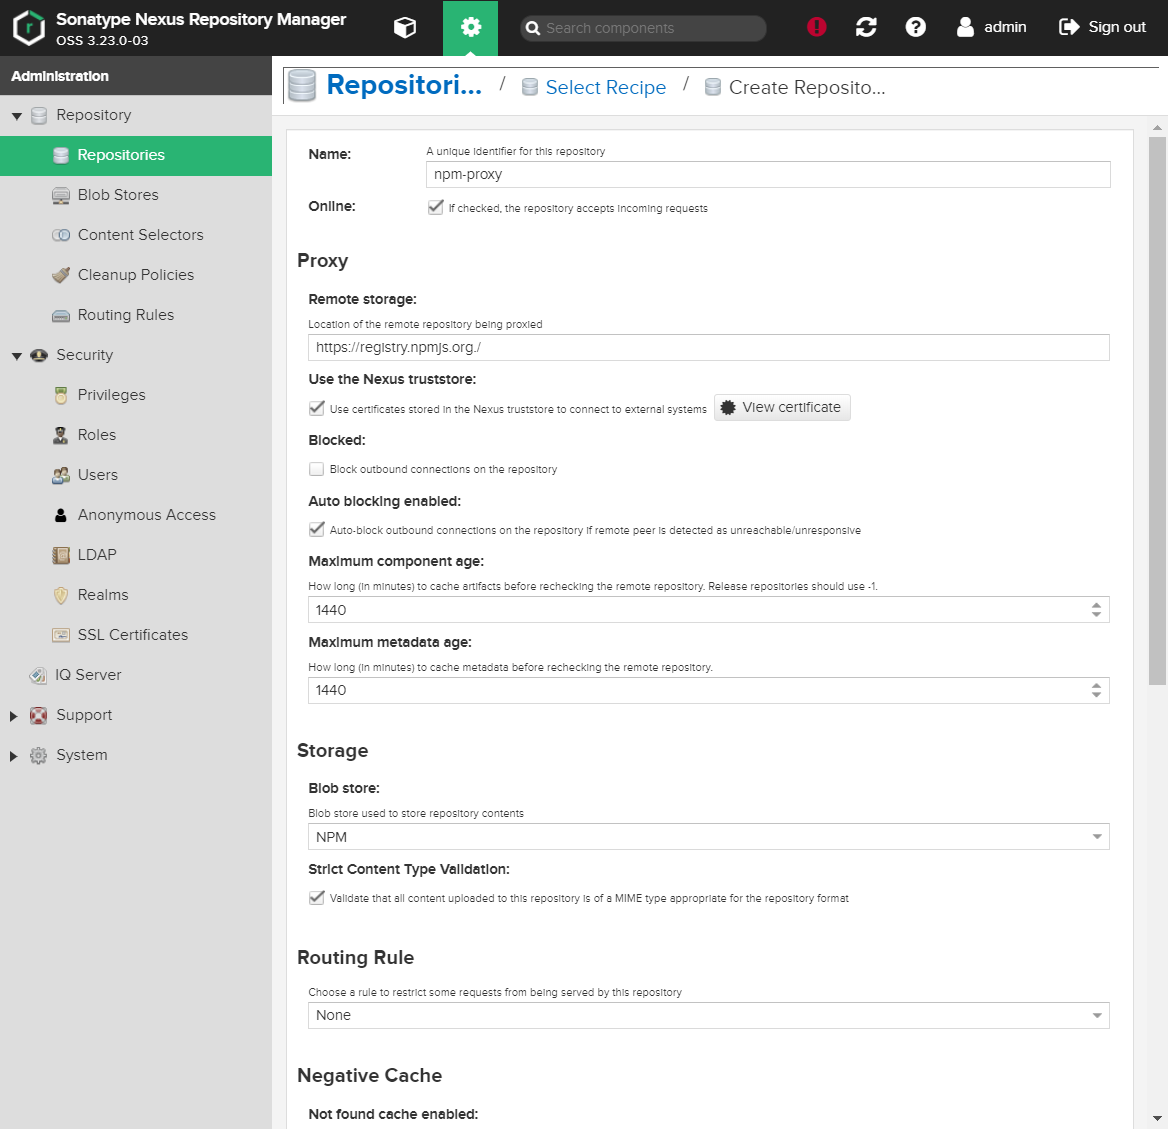
give the proxy Location as https://registry.npmjs.org
6. Creating group repository
Creating a group repository as described earlier is to combine the hosted and the proxy repository which makes the reads much easier. Let us create the npm (group) and configured it as below.

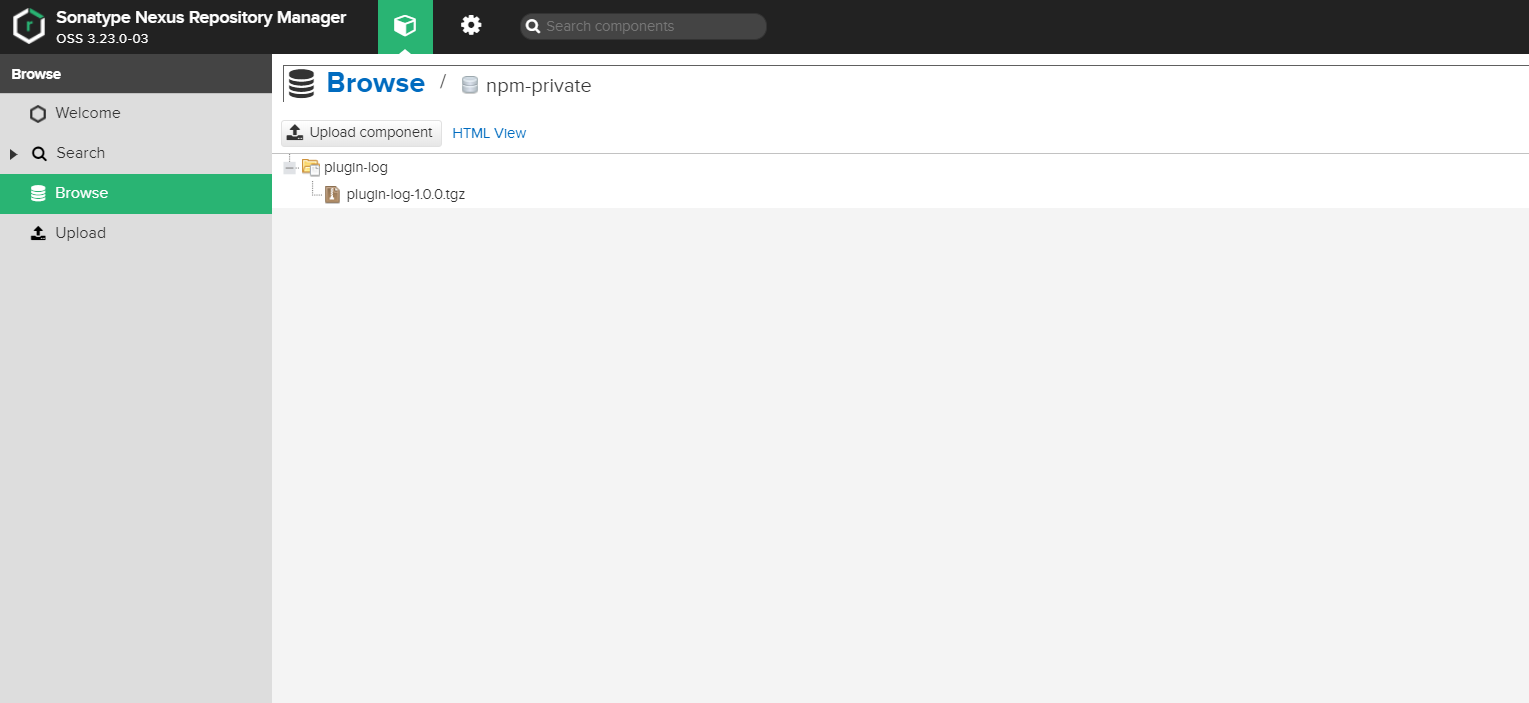
7. Pushing binaries to Nexus
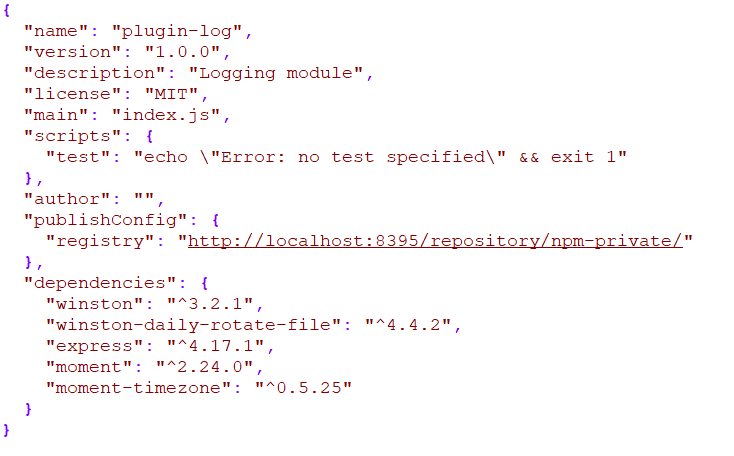
Let us first create a sample NodeJS project with a blank index.js file and push it to our hosted repository. Create a folder and add index.js and package.json files there. You can add your customized logic inside the Index.js file and for package.js add the following.
We need to add additional realms to enable npm publish feature. To enable the additional realms, go to Settings > Security > Realms.
Add the npm Bearer Token Realm and save the changes. Additional information about the realms is available here.

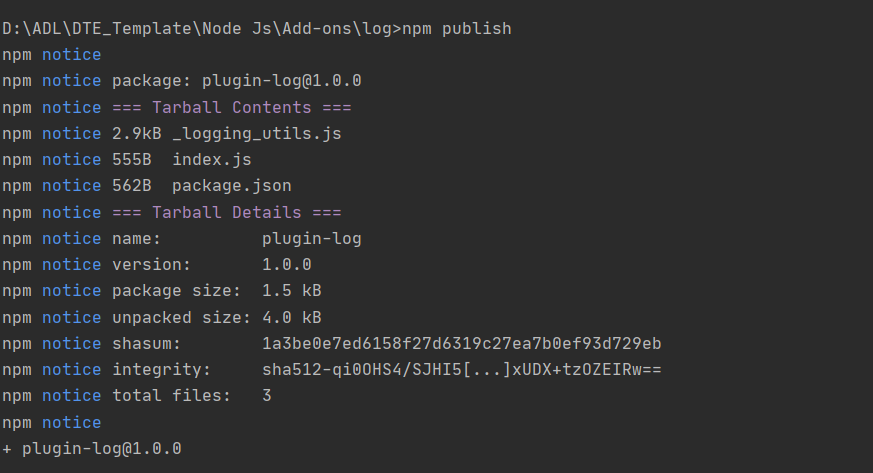
Then type the below command. Instead of admin user use the user (npmuser) that we created in the beginning.

Then use the command npm publish and you'll see the following result.
8. Pulling Binaries from Nexus
First we have to log out from the private repository and log into the group repository. By logging into the group we'll be able to use both custom and default npm packages.
npm logout --registry=http://localhost:8395/repository/npm-private/

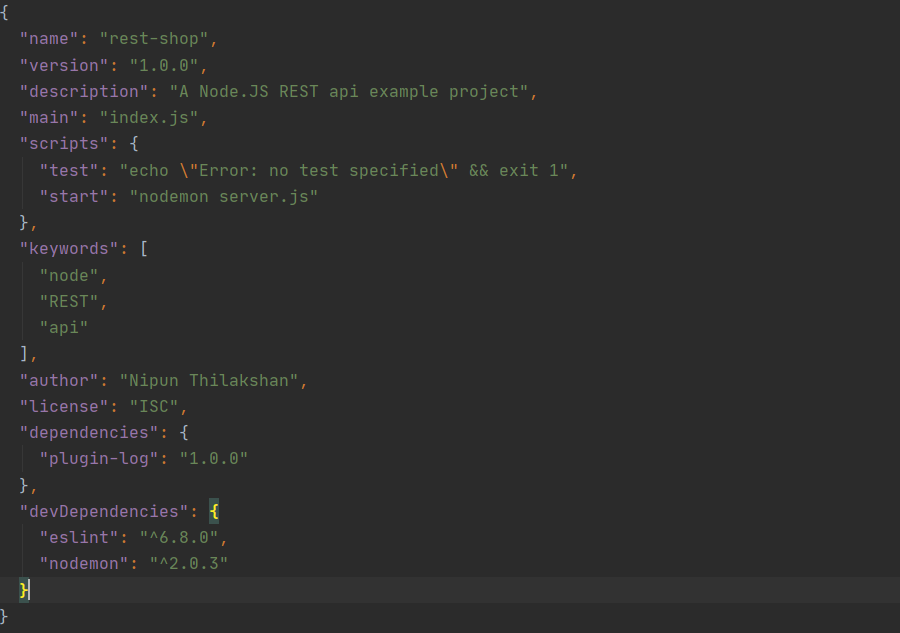
Let's create another node project to test this and add the plugin-log dependency we developed.
mkdir test-project&& test-project
npm init -y
Then run npm install and you can see following result in your node-modules folder.
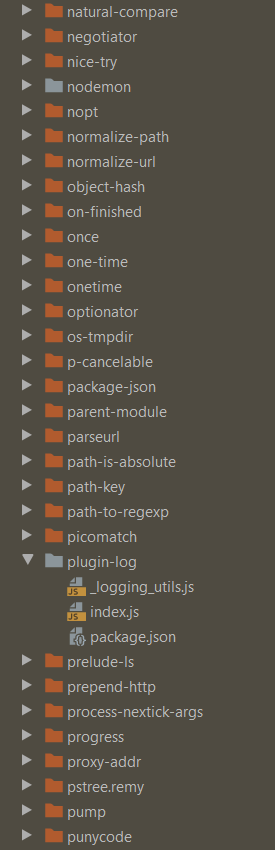
Therefore you can use it as a node package for your use cases. This way you can add reusable components to Sonatype Nexus Repository and maintain a proper versioning of the added features.
Conclusion
This article only covers some basics on how to use Sonatype Nexus Repository as a repository manager. Although we run the container and mount the volume to a local directory, it is highly recommended that you try the above on a cloud provider of your choice. Keep in mind that in the case of cloud providers (or self-hosting) you would need to back-up the volume for disaster recovery.
Reference: https://levelup.gitconnected.com/deploying-private-npm-packages-to-nexus-a16722cc8166