
Github Link for the source code: https://github.com/vishwakarmarhl/jenkinstest
Here we discuss the setup for a Continuous integration pipeline. This is for mavenized Spring boot build with JaCoCo coverage reports and Sonar metrics. I used a windows machine with Tomcat 8 for hosting jenkins, but similar setup can be done on any OS where Sonar server can run on the same system.
A. Get the following artifacts on the system
- Tomcat server with Java JDK – Configure the server.xml to run on port 8099
- Setup Maven & other build utilities on your machine
- Access to Github source code
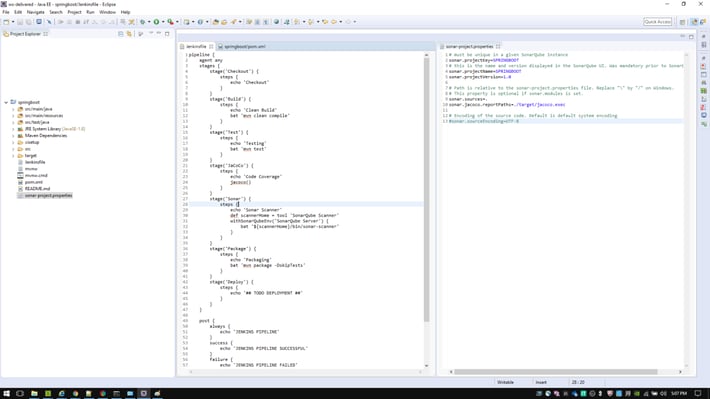
- Source code should have the Jenkinsfile in project root to be used by the pipeline
- Source should have the sonar-project.properties in project root for the SonarQube project linkage & source paths
B. Setup & Startup SonarQube
- Download the SonarQube package from https://www.sonarqube.org/#downloads
- Start sonar server: SONAR_HOME\bin\windows-x86-32\StartSonar.bat (for 32 bit Windows)
- Open Sonar admin page “http://localhost:9000“. Default credentials – admin/admin
- Create user in security tab and generate an access token, 50997f4a8c26d5698cccee30cf398c0ed9b98de0
- Create a project SPRINGBOOT with a key
- Download SonarQube scanner from https://docs.sonarqube.org/display/SCAN/Analyzing+with+SonarQube+Scanner
- Additional configuration from https://docs.sonarqube.org/display/SCAN/Advanced+SonarQube+Scanner+Usages
C. Setup & Startup Tomcat
- Download jenkins.war from https://jenkins.io/download
- Put the jenkins.war file in webapps folder of Tomcat home
- Set Environment Variables as follows,
- SET JENKINS_HOME=”C:/Users/vishwaka/Documents/Workspace/git/jenkinstest/cisetup/jenkins_home”
- SET CATALINA_OPTS=”-DJENKINS_HOME=C:/Users/vishwaka/Documents/Workspace/git/jenkinstest/cisetup/jenkins_home”
- Start the server using startup.bat
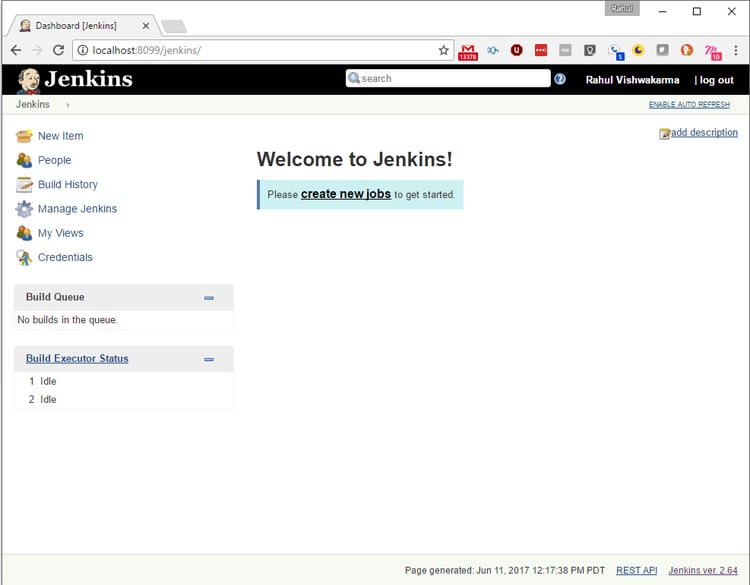
D. Initialize Jenkins
- Access Jenkins at http://localhost:8099/jenkins
- Provide the initial credentials from jenkins_home/secrets/initialPassword*
- Install the default set of plugins and proceed
- Create a user for this installation
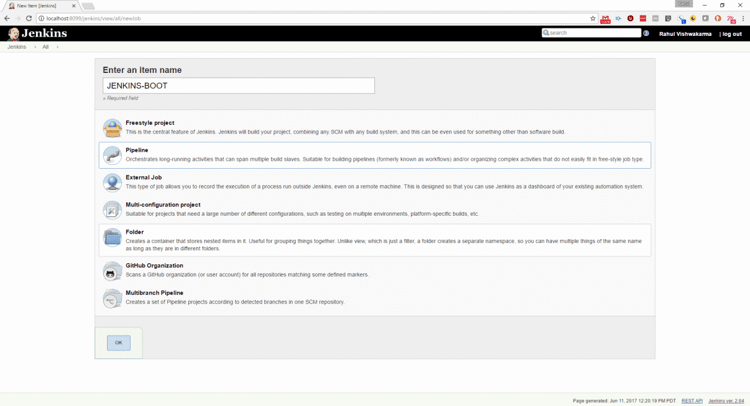
- Use “New Item” for creating a pipeline and provide the Jenkinsfile pipeline script from Git SCM for this
E. Plugin & Configuration to Jenkins
- Add the “JaCoCo plugin” through the Manage Jenkins > Manage Plugins and install without restart
- Add “SonarQube Scanner for Jenkins” through the same Plugin Manager as above
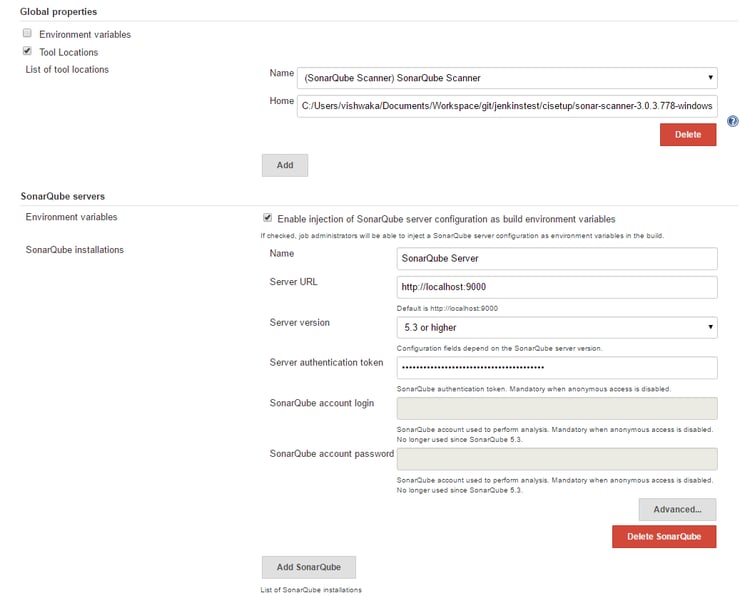
- Go to the Manage Jenkins > Configure system and provide the credentials for Sonar Server
- Add the “SonarQube Server” name running on URL http://localhost:9000 alongwith user authentication key generated in SonarQube Server user administration page
- Remove the auto install option and add the “Sonar Scanner” env variable SONAR_RUNNER_HOME installation path as $JENKINS_HOME/sonar-scanner-3.0.3.778-windows through “Global Tool Configuration”
- Make sure the Sonar scanner path is configured properly as its path is hard coded in Jenkinsfile.
F. Run the Build now for this pipeline
- The pipeline is at http://localhost:8099/jenkins/job/JENKINS-BOOT/
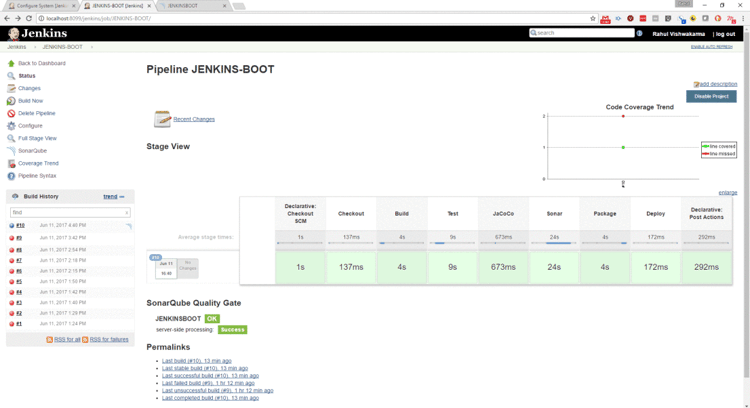
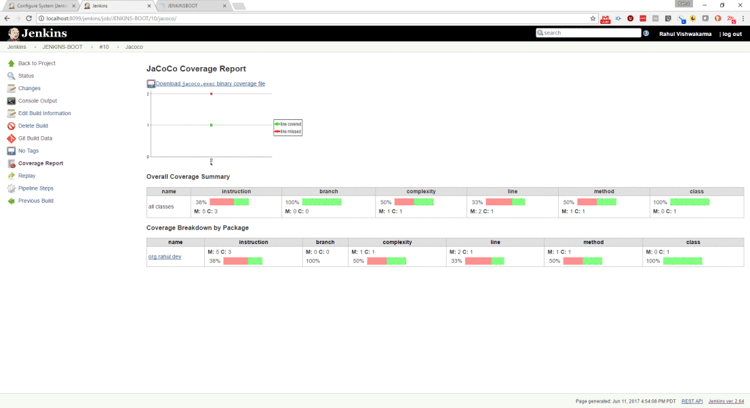
2. Checkout the coverage report within the pipeline reports
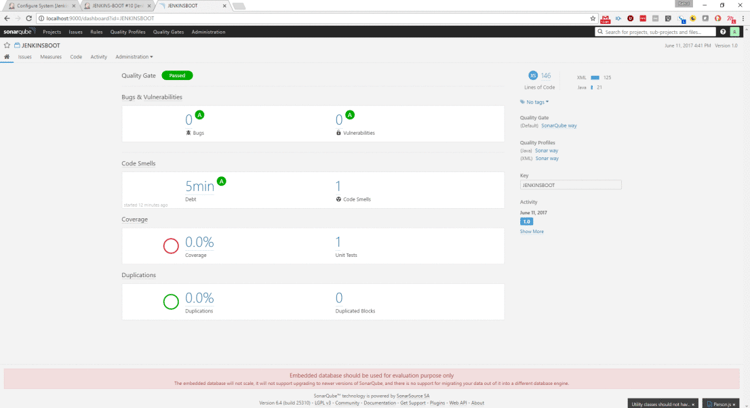
 3. You can also look at the Sonar reports at http://localhost:9000/dashboard?id=JENKINSBOOT
4. If you have many such projects then its better to execute all your Job Pipelines from a parent Job Pipeline. You can create one and call it “BUILD-ALL-JOBS”. It can be configured using the below pipeline script to run your JENKINS-BOOT job described in the example above as well as any other fictitious job call JENKINS-BOOT-XXX.
node {
    stage('JENKINS-BOOT-STAGE-A') {
        build job: 'JENKINS-BOOT'
    }
    stage('JENKINS-BOOT-STAGE-B') {
        build job: 'JENKINS-BOOT-XXX'
    }
}
There are plugins to build jobs in parallel as well but that depends on what workflow you want to build in your system.
G. Adding Nexus repository management capability to your CI environment from my blog
H. Finally put everything into a script that can run it all
Pardon my naive & careless script, considering my setup is on a local windows development workstation.
@echo off
echo "--------------------------------------------------------------------------"
echo "------------------------- CI STARTUP SCRIPT ------------------------------"
echo "--------------------------------------------------------------------------"

echo "Startup SonarQube Server"
echo "------------------------"
START CMD /C "cd c:\Dock\ci\sonar\sonarqube-6.4\bin\windows-x86-64 & CALL StartSonar.bat"
echo "Sonar may be up on http://localhost:9000/"

echo "Startup Nexus Repository Manager"
echo "--------------------------------"
START CMD /C "cd c:\Dock\ci\nexus\nexus-3.3.1-01\bin & nexus.exe /run"
echo "Nexus may be up on http://localhost:8081/"

echo "Startup Jenkins on Tomcat"
echo "-------------------------"
START CMD /C "cd c:\Dock\ci\jenkins\apache-tomcat-8.5.15\bin & startup.bat"
echo "Jenkins may be up on http://localhost:8099/jenkins"

echo "-------------------------------- END -------------------------------------"
About Rahul Vishwakarma
 Strong application design and development skills in the area of cloud, analytics and Internet-of-Things initiatives. Oriented on design, development and management of big data, public cloud and connected devices ecosystem. I love problem statements, and the best times are spent brainstorming for their solutions.
Heading towards Machine Vision and connected research areas on signals.
Resources for this Article